Showing posts with label minialbum. Show all posts

May 20, 2013

It’s A Blog Hop!!

Welcome to our blog hop!  If you have arrived directly here and were not aware of the blog hop, jump back to the start at Suzy’s Blog - Sea Glass & Sand and join in the fun. There are prizes!!

If you have arrived from the lovely Julie’s blog – Notes on Paper  then you are on track!

Suzy has organised this blog hop to mark the launch of her new jazzy blog. I’ve been helping her re-design the look of her blog to better reflect her and her favourite things and to incorporate her fab art journaling work. What do you think to her new look ?  Fab isn’t it, if I say so myself. I’m no expert by any stretch of the imagination but I can find my way around PSE and the geek in me loves to dabble in a little bit of HTML / CSS.

So onto my project for the blog hop. I wanted to share this project with you, it’s something that I have been wanting to do for a while and have thought about loads of different ways / formats for doing it but never really settled on one final idea until I came across a second hand photo album in a local charity shop. The minute I saw it I had one of those ‘light bulb’ moments. I snapped it up at a bargain price of 20p!

It obviously once belonged to a set of 3 (or maybe more) judging by the ‘three’ printed on the cover, but that was not a problem as the cover was going to be completely hidden.

Here are the materials I started off with: the second hand photo album and various papers from Echo Park’s The Apothecary Collection. Yes, they are Halloween papers but my album is not Halloween themed. The colours on these papers just happen to fit my theme perfectly . . . . all will become clear.

image-1

Firstly I covered the back and front covers with some of the paper which I inked with Walnut Stain & Spiced Marmalade Distress Inks to give it a more aged feel. I covered the spine with a coordinating piece again inked with the Distress Inks. To add interest to the spine and to give the illusion that my internal pages were ‘tied in’ I used some twine and wrapped it around the album and tied off in a knot.image-2

I added some more layers of patterned paper with some pearls and a decorative pin. The metal trim corners add texture and the paw print stamp in the centre of the heart completes the look. Any idea’s on the theme of the album yet? (If your a regular visitor to my blog I'm sure you will have guessed already . . lol)image-5

And here is the finished altered album. The heart shape with the paw print tells you the title of the album without using words.

Paw Prints On My Heart

image-6

So why the Halloween papers ? Well the browns, oranges and blacks just happen to be the perfect colours to coordinate with all of our cats and dogs.  Im using this album to record each and every one of the furry family members who share our home. Everyone has a double page with a photo on the left and a record card on the right where I have recorded a little bit of information such as name, D.O.B. etc and a few details about their individual characters. Here is Murphy’s entry:


image-4

And just a few of the other furry family members:

BeeGee, Baily, Lincoln and Sookie

image-3

Now for those of you who don’t know me I’m sure your wondering how many more furry members can there be in that book ?  Well, at present the book holds 25 entries and yes there are spare pages in there  - just in case!! Our home is somewhat of a kitty and canine haven / sanctuary. We have 16 rescued cats and kittens and 9 dogs (5 chocolate labs, 3 Shih Tzu’s and a very senior Yorkie). I do plan on doing another album to hold the photo’s and memories of those who have crossed The Rainbow Bridge so that they are forever recorded too.

I hope you’ve enjoyed watching the transformation of an old unwanted photo album . . .  it’s amazing what a bit of pretty paper can do. The album will now sit with pride of place on my mini album display shelf for all to see. Who knows, I may even carry it around in my handbag to show off to people when they ask about my furry babies.

Before you head off on to the next stop on the hop please leave a comment to let me know you stopped by. I will chose at random one lucky reader to receive a prize from me. (entries to the draw will close at midnight on Tuesday 21st May)

Your next stop is Claire’s Blog  – The Crafty Alchemist

Enjoy!!

Sep 25, 2012

Take one cheap note pad. . . . .


notepad


some sheets of canvas paper, a few scraps of Fancy Pants Country Boutique paper, a bit of lace and a button and what do you get ?


This.

notepadwebboard

This note pad is going to sit beside my computer so when I see something that inspires me I can jot it down, draw a picture or even print out things and stick them in.

I used the twill ribbon to create a clasp and placed a small magnet underneath the canvas sheet before sticking it down and the opposite magnet is sewn in under the lace bloom. 

Not bad for a 34p note pad eh!

May 14, 2012

The Places I Love Mini Album

I am a very proud member of The Rik Rak Ravers, my team on UK Scrappers. We support each other, inspire each other and most of all make each other laugh. 

Within the team we have had swaps and challenges which are great fun and keep the team building an on-going process. So far we’ve had a ‘chinese whisper’ layout challenge, a recipe tag swap, an embellishment swap and a handmade flower swap so when it came up for discussion as to what we should do next I jumped in with the idea of a handmade Mini Album swap (everyone knows I love a mini! x) but unfortunately not all the teamies were as inspired by this as I was as some of them are not really ‘into’ the whole mini album thing and said they struggled to know where to start with making one.  A suggestion was then made that I should make a mini album for them all to copy and we would all keep our own albums . . . .  hence this class was born.

This is the first time I have ever done a class for other people to follow but I really enjoyed doing it. One of my teamies asked for a YouTube tutorial . . . lol   there was no way that was going to happen – I am not a performer and would get totally tongue tied.  I included lots of pictures though as I think visual instructions are easier to follow.

I used an old pizza box to make the cover for this album  (yes the kind we all have our lovely scrapbooking stash delivered in!) – I told you I love to recycle.

So here’s my finished album – the link to the pdf file for the instructions is at the bottom of this post if you fancy having a go.


THE PLACES I LOVE

mini-36

Just a few of the inside pages featuring my favourite places

mini-38

mini-39

mini-40

mini-41

mini-42

mini-45

mini-47

mini-48

mini-49

mini-46

mini-50

mini-51

mini-52

You can download the pdf file for the instructions on how I made this by clicking the link below. If you do make one please link back to this post, I would love to see it.


Thanks for stopping by!
xx

Dec 4, 2011

Getting Ready for 2012!

While most people at the moment are preparing for Christmas Im preparing for 2012. Im not a great fan of Christmas and therefore I dont do any Christmas crafting, although I have been know to make the odd Christmas card for a select few!

This time last year I was scanning the internet for projects I could do / follow during 2011 and I found the likes of Project 12 and Photography A-Z both of which I started and then failed miserably at finishing. I was so disappointed in myself for not keeping up with these but life never ever goes the way we think it will and I just didn’t have the time or the heart to complete them.

This year I have decided that for 2012 I am not taking on any projects. I am going to do what I can when I can that way I put no pressure on myself to complete things. That said I do want to record my family’s year somehow and while blog-hopping recently I found this inspirational post from Emily Pitts.

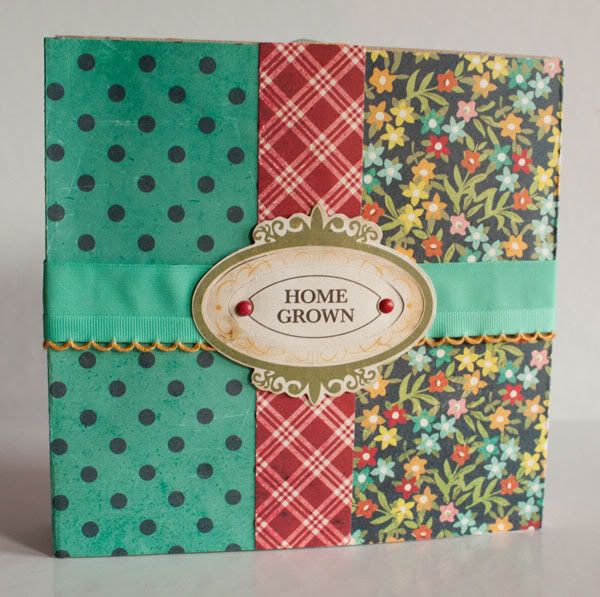
The overall size of her album was too small for what I wanted so I adjusted things slightly to suit and so my finished album measures 6¼” x 6¼”. The paper range I used is Crate Paper Farmhouse which I got in my My Creative Scrapbook kit back in October. Its a fabulous collection and lends itself to so many uses.

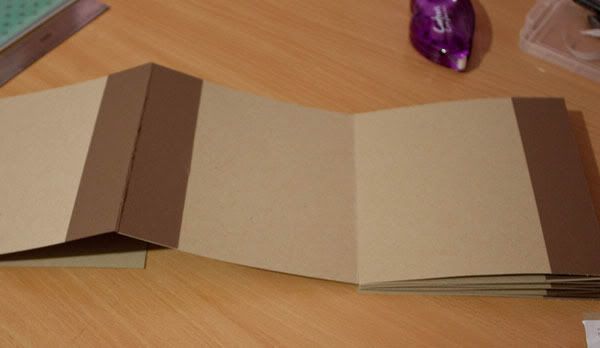
I started with some kraft cardstock and a few brown cardstock scraps and made the accordion pages:

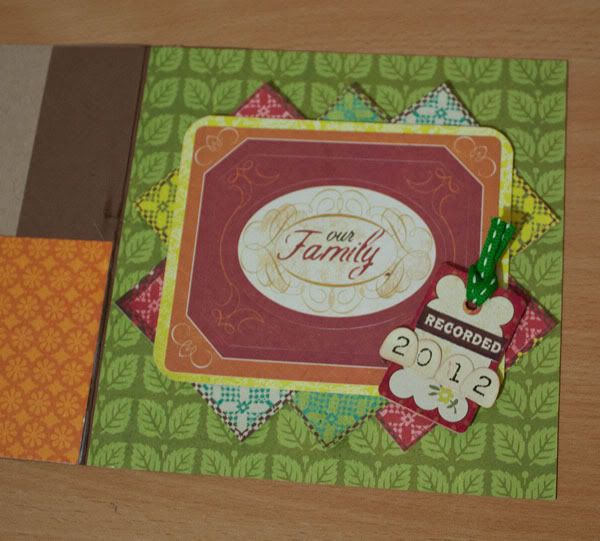
This is the front of the accordion insert which I decorated:

Next I made the wrap-around cover. Now for the confession!  I actually stuck the cover on upside down so that the larger flap was on the wrong side  but by the time I realised it was stuck firm and I was not about to try to rectify it! So the cover unfolds from the wrong side – but hey, variety is the spice of life!

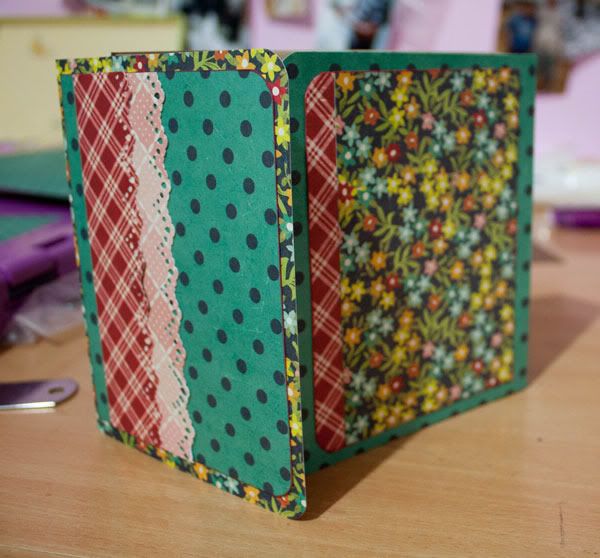
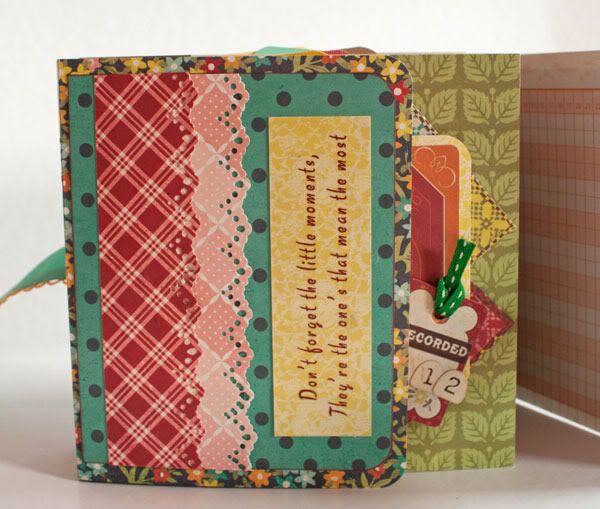
Here is the finished front cover. See what I mean about opening the wrong way ?  I still think it looks fabulous though.

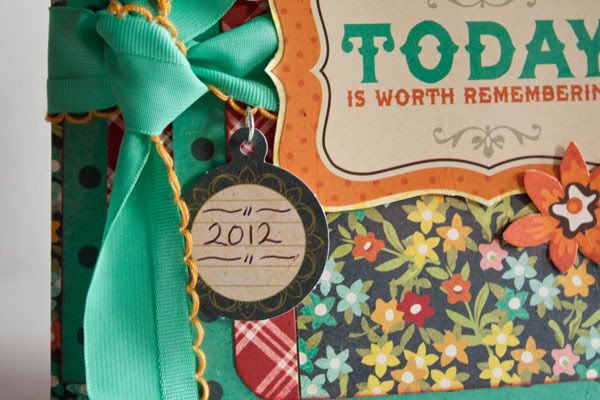
A cute little 2012 tag attached to the ribbon with a jump-ring:

Inside on the left hand flap is the quote ‘Don’t forget the little things, they’re the one’s that mean the most’

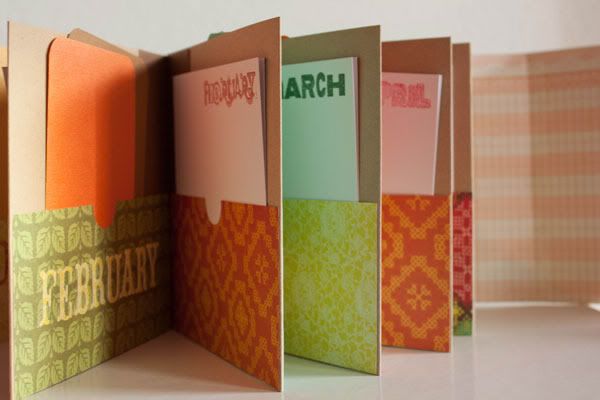
Another pic of the front of the accordion section:

Each month of the year is allocated a double page. On one page the pocket contains two tags which I will stick snapshots to. On the other page the pocket contains a 5”x5” card which is my ‘Graffiti Wall’ this is where I will record the goings on for that month, things I want to remember (or forget as the case me be!) and stick ephemera to.

I have kept the inside quite plain and simple. I want to be able to record each month quickly and easily without too much need for decoration and embellishment which I have done in previous year’s albums.

And finally the back cover:

So I am all set for 2012 – bring it on!!

Thanks for stopping by,
Hugs
Dee
xx

May 26, 2011

‘Cherish’ - Another Mini . . . .

I made this mini album using Basic Grey Two Scoops almost 2 years ago yet only yesterday did I finally get round to finishing it off and actually putting photo’s in it!  How crazy is that ?

The photo’s are of the man I cherish the most – my husband.

cherish-1cherish-2cherish-3cherish-4cherish-5

The style is a bit all over the place and some of those hand made embellishments are a bit dodgy but I like it and Im glad it finally has photo’s in.

Thanks for stopping by,
Hugs
Dee
xx

May 15, 2011

Puppy Love

My crafting MOJO is coming back slowly but surely. I’ve had fun playing around with this paper bag album over the last few days which I have filled with cute  photo’s of Lincoln. I used the March Gottacraft Kit which was Echo Park ‘For the Record’  and added only a few blooms and themed buttons (cute paw prints, bones and a dog house) some doilies and odd bits of ribbon.

PL-1

I love the contrast of rich and subtle colours in this range,  its definitely one I need to buy more of!

PL-2

I decided not to put any journaling on the pages as the photo’s pretty much speak for themselves.  What's that famous quote – ‘A picture speaks a thousand words’

These are the pages:

PL-3

PL-4

Cute bone button!

PL-5

PL-6

Aww!  Spot the paw print button.

PL-7

PL-8

PL-9

This is my favourite page!  The photo’s are only small but I like the idea of the film strip feel. He has such fun with that bucket too!

PL-10

Water baby x

PL-11

Fluff in motion.

PL-12

So the MOJO flow’eth!  Lets hope it stays that way because I have a few projects that I need to do that have deadlines over the next couple of weeks and another mini album that I did well over a year ago which never actually got finished so its on my list too.

Thanks for stopping by,
Hugs
Dee
xx